ideas · manufacturer info · projects

new clearsnap products!

among CLEARSNAP’s new releases at cha were DESIGN ADHESIVES, GLITTER and some new EMBOSSING POWDER colors… they aren’t in stores yet, but they will be soon!

DESIGN ADHESIVES are a little like rub ons, you place them where you want them and rub them on, but what you get when you peel away the backing, is a design in adhesive. it’s sticky so you can add glitter, embossing powder, pearl-ex, flocking, microbeads, etc. the new GLITTERS work wonderfully with the design adhesives! they are super fine and have a brilliant shine! you can also cut the design adhesives apart and place the pieces where you want them, or put one element down at a time to easily layer on colors.

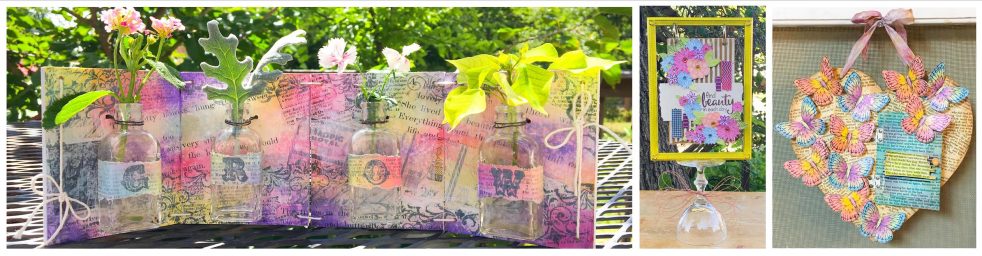
i’ve made 2 wedding cards using the new products. i used a fancy scroll pattern with metallic papers and glitters on one, and the other card is more casual with hearts and pink and blue papers and embossing powders. the directions and supplies for both cards are given. (and yes, i KNOW that number 8 in the directions for the mr & mrs card is showing up as a smiley face! i have NO idea why though! LOL!)

“best wishes” card


supplies:

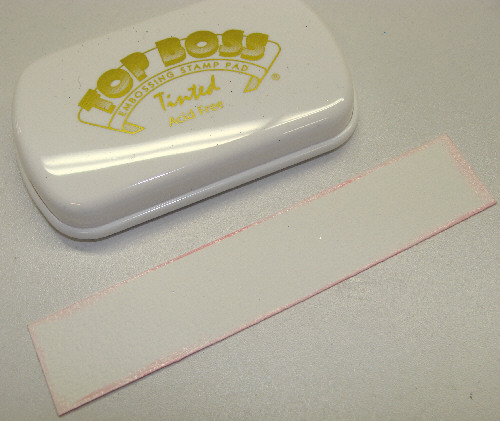
Clearsnap: Design Adhesives – ornate border, Glitter – fool’s gold, silver lining and winter frost and Top Boss – white embossing powder 

Prism: metallic cardstock – bronze and gold leaf and prismatics – suede brown

Sakura: Quickie Glue

directions:

1) cut a 7″ X 7 1/2″ piece of bronze cardstock and fold in half lengthwise to make card.

2) cut a 3 3/8″ X 7 3/8″ piece of brown cardstock and adhere to center front of card.

3) cut a 2″ X 7″ piece of gold cardstock and adhere DESIGN ADHESIVES to it.

4) working carefully, apply WHITE FROST GLITTER to the heart designs in the border, only use a small amount of glitter, and press lightly. flip quickly upside down and tap off excess glitter.

5) apply FOOL’S GOLD glitter to the thicker part of the scroll pattern.

apply glitter
add gold glitter

flip over quickly and tap to remove excess glitter

gold glitter applied

6) apply SILVER LINING glitter to the rest of the design; flip and tap to remove excess glitter.

finished embellishment
7) adhere glittered piece to a 2 1/4″ X 7 1/4″ piece of bronze cardstock and adhere to card.
 
8) use quickie glue pen to write “best wishes” above the border. apply white embossing powder, remove excess and then heat set with heat gun.


“mr & mrs” card


supplies:

Clearsnap: Design Adhesives – dancing hearts, Embossing Powder – sterling silver, ballet pink and lullaby blue and Top Boss – embossing stamp pad
 
Prism: Prismatics black, white, pink and blue cardstocks
 
My Sentiments Exactly: perky lower alphabet clear stamps
 
The Paper Company: silver swirl paper
 
EK Success: 3D dots

directions:

1) cut a 5″ X 10″ piece of black cardstock and fold in half to make card.
 
2) cut a 4 1/4″ square of blue cardstock and adhere to front of card.
 
3) cut a 4″ square of pink cardstock and adhere to front of card.
 
4) cut a 3 3/4″ square of printed paper and adhere to front of card.
 
5) cut a 1″ X 5″ strip of white cardstock, run EMBOSSING PAD around edges of strip. apply STERLING SILVER embossing powder, remove excess and heat using a heat gun.
tinted embossing pad makes it easy to see where you are applying it
6) stamp “mr” using PERKY stamps on strip, emboss with LULLABY BLUE embossing powder. then stamp “&”, and emboss with STERLING SILVER embossing powder. and finally stamp “mrs” and emboss with BALLET PINK embossing powder.
stamped strip & my sentiments exactly stamps

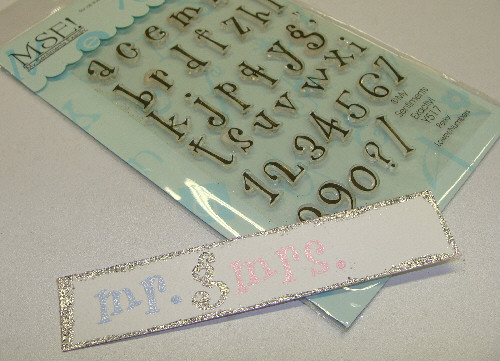
 7) cut 2 hearts from dancing hearts DESIGN ADHESIVE strip. cut centers patterns from hearts.

center designs removed
8) apply heart designs to scrap piece of white cardstock, apply SILVER LINING embossing powder, remove excess and heat set using a heat gun.
embossed hearts
embossed hearts
9) apply designs to center of hearts.
center designs applied
10) emboss one heart center using BALLET PINK embossing powder and use LULLABY BLUE for the other.
center designs embossed

11) adhere stamped strip to card, then adhere pink heart, use a 3D dot to adhere blue heart.

please leave a comment; i'd love to hear from you!

Fill in your details below or click an icon to log in:

WordPress.com Logo

You are commenting using your WordPress.com account. Log Out /  Change )

Facebook photo

You are commenting using your Facebook account. Log Out /  Change )

Connecting to %s